Printlab Autodesk

3 – Skill Building

In this Make:able toolkit, you’ll be learning new and modern technical skills that you can apply to your own unique assistive device further into the project. Watch the overview video below before participating in one (or more) of the design tutorials available in the toolkit. Try and select tutorials that might teach you relevant skills for your own project.


Before you participate in tutorials, select an Autodesk 3D design software to use throughout the challenge and ensure your account is set up. We recommend Tinkercad for students in the under 14 category and Fusion 360 (see next section) for 14+ age groups.

Tinkercad is a free, browser-based 3D design, electronics and coding app made by Autodesk. When using Tinkercad’s 3D design workspace, you begin with what’s essentially this construction kit of shapes. Think of these shapes as digital lego that you can place and adjust, before combining them with other shapes.


Tinkercad is the perfect entry point for people getting started with 3D design, yet it’s got the versatility and complexity to design almost anything you can imagine. Get started with Tinkercad by clicking the button below.
 

Go to Tinkercad


Fusion 360 is a cloud-based, full product design platform used amongst innovative and creative industries. Its comprehensive set of tools enable you to design with precision, render realistic images, simulate loads, animate joints and much more. Check out the overview video below, created by Make:able partner, Kevin Kennedy from Product Design Online.


The amazing thing about Fusion 360 is that it’s intuitive and user-friendly enough for beginners to get to grips with – and it’s completely free for educators, students and hobbyists.


Go to Fusion 360


PrintLab is our very own online platform of 3D printing courses and projects, which can help you build new technical and creative problem-solving skills in preparation for your Make:able journey. Although PrintLab is a paid-subscription, we invite you to use the free trial to explore and participate in a range of relevant resources. And at the end of the trial, you can choose whether you’d like to subscribe to PrintLab. Below are some recommend PrintLab resources.

A grid of 3D shapes in an isometric view.

Intro to Tinkercad

This mini course combines all the key fundamentals of 3D modelling in Tinkercad into a 1-2 hour session. From navigating the model workspace and placing objects to mirroring and combining shapes, you will be provided with a complete overview of the tools and opportunities within Tinkercad software.

Learn More

A 3d model of a nut and bolt.

Intro to Fusion 360

In this skill-building mini course, you will learn how to get started with Fusion 360 for solid modelling. A series of base models are provided with the course, which are uploaded into Fusion 360 and used in conjunction with 13 bitesize instructional videos. Each video focuses on a different set of Fusion 360 tools, giving you a complete beginner’s overview of Fusion 360’s solid modelling tools.

Learn More

A 3D model of 16 cubes, each showing different 3D print settings such as infill and support material.

Slicing for 3D Printing

In this short online course, you will learn about 10 essential slicer settings to help get the most out of your 3D printer. The course is video based and based on FFF (Fused Filament Fabrication) 3D printers. From print speed and temperature to outer layer thickness and orientation, you’ll be sure to learn some handy tips to achieve good quality prints.

Learn More

A graphic collage of a 3D printer nozzle printing a bridging model.

Designing for 3D Printing

In this short online course, you will learn about the best practices for designing specifically for 3D printing. The course is video based and goes over 10 essential tips to achieving good quality prints on FFF (Fused Filament Fabrication) 3D printers.

Learn More

A website screen showing PrintLab's tactile games project learning platform.

Assistive Technology Projects

PrintLab has a range of step-by-step assistive technology projects that take you through the full design process using a series of design-thinking methods. These are great for becoming familiar with 3D CAD, idea generation and problem solving techniques specific to assistive technology.

Learn More

3D CAD Tutorial Library

Looking for quick tutorials rather than full projects? PrintLab’s 3D CAD Tutorial library is the ultimate toolkit of Tinkercad and Fusion 360 tutorials and includes a whole section dedicated to assistive devices.

Learn More


Ready to Get Started?

Click the link below to get started with your free trial to PrintLab. If you are a student under 18, please request that your teacher signs up to the trial on your behalf. They will then be able to share relevant resources with you.


Start a Free Trial to PrintLab


In this section, you’ll learn how to build the MMC60 round flexure switch – a cost-effective, 3D printable accessibility switch. The switch is activated by applying pressure on the top surface. This switch can be connected to any standard AT interface, and can also be used with the Xbox Adaptive Controller.


Building the Switch

Head over to the Makers Making Change website here for full details on the round flexure switch, together with the bill of materials and downloadable STL files. Once you have a good overview of the switch and gathered your supplies, follow the below tutorial to build the switch.


Customising the Switch

In addition to building the switch, check out some of these tutorials to customise the buttons on the device.


3D printed assistive gaming switches.

3D scanners serve as invaluable tools for crafting tailor-made devices that perfectly suit your end-users. They enable you to meticulously capture highly precise data of both humans and objects alike. Below are a series of videos that introduce you to our 3D scanner of choice – the Einstar by Shining3D. The videos cover the basics of using the scanner, 3D scanning tips, as well as 2 Fusion 360 tutorials that show you how to manipulate mesh data to create assistive devices. If participating in the tutorials, you will require access to these 3D scan data files, which will be imported into Fusion 360.

The below videos have been created by Make:able Partners, CREATE Education and Product Design Online.

Chris Harrison from CREATE Education.

Einstar Unboxing

The CREATE Education Project is excited to unbox Shining's new handheld 3D scanner EINSTAR, equipped with powerful technology, including, 3 infrared VCSEL projectors, 2 stereo depth cameras and 1 RGB colour camera.

Watch Video

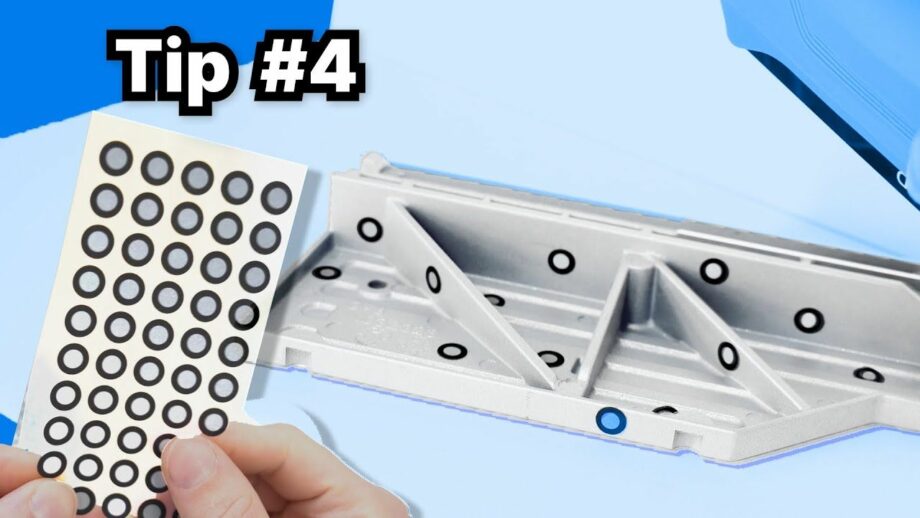
An engineering part with 3D scanner stickers spread across it.

3D Scanning Tips

Product Design Online share 7 3D scanning tips for unbeatable results. The tips shown are based on using the Einstar 3D scanner but are also relevant to other light based 3D scanners.

Watch Video

A 3D model of a head scan with an assistive head pointer designed around it.

Head Pointer Tutorial

Product Design Online teaches you how to design an assistive head pointer device using an example head 3D scan and Fusion 360 software.

Watch Video

2 3D models of a cane grip showing the transition between an organic model and a t-spline model.

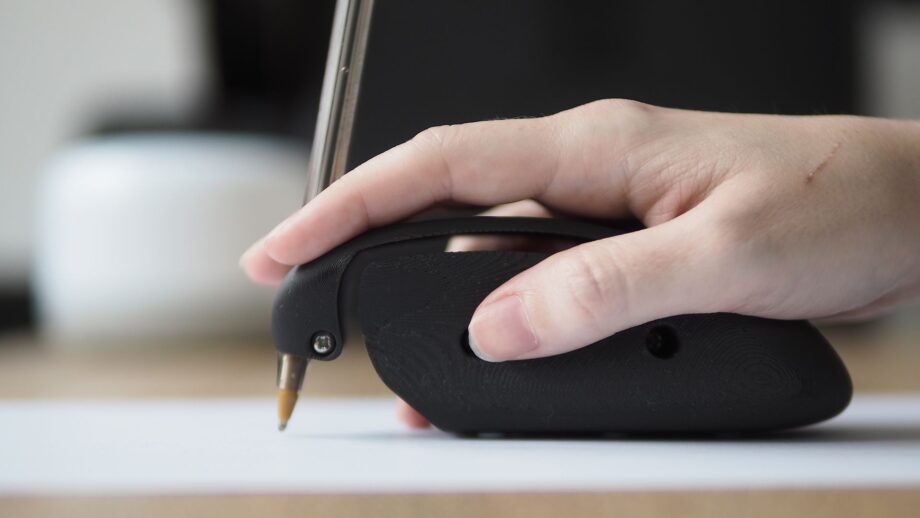
Cane Grip Tutorial

Product Design Online teaches you how to design an ergonomic cane grip using an example clay 3D scan and Fusion 360 software.

Watch Video


This section of the toolkit focuses on designing a multi-tool attachment to an open source prosthetic hand by e-NABLE. The e-NABLE Community is an amazing group of individuals from all over the world who are using their 3D printers to create free 3D printed hands and arms for those in need of an upper limb assistive device. Check out their website to learn more about their work and impact.

Before making and adapting e-NABLE hands, it’s very important to understand that they are experimental devices, which aren’t safe for heavy operations. Their purpose is to support the use of light activities and working with qualified clinicians/medical professionals is highly recommended. You can read e-NABLE’s safety guidelines here.


Designing a Multi Tool Attachment

In this tutorial, you will learn how to use Autodesk software to design a multi-tool attachment for the open source e-NABLE Phoenix v3 hand. The device attaches to the side of the hand and has 3 additional elements including a door hook, bottle opener and stylus/pointer. Both Tinkercad and Fusion 360 tutorials are available to choose from. After designing the multi-tool, you can follow the instructions in the next section to 3D print and assemble the open source hand, together with the attachment.

A 3D printed hand prosthetic labelled with its various components.

Making the Multi Tool Attachment

With your multi-tool attachment designed, it’s now time to 3D print and assemble the device. The first step is to 3D print your components, which include the open source e-NABLE Phoenix Hand v3, together with your multi-tool attachment. Remember to print your modified version of the palm section, which allows your multi-tool to attach to the hand (the modified palm section will require supports when 3D printing). The STL files and printing instructions for the e-NABLE Phoenix Hand v3 can be found on Thingiverse here. Pay particular attention to the notes about scaling and print settings.

With your components 3D printed, follow the below video to assemble your hand. Please note that dental bands and fishing wire are required to assemble the device. We recommend watching the video first and then gathering your supplies.


For those of you opting to design a solution for the blind and visually impaired, or for anyone looking to make their products more accessible to all, we have an amazing treat for you! Our friend and multidisciplinary artist, Allie Katz, has kindly allowed us to share their amazing video about 3D printing braille. Throughout the tutorial, Allie guides you in preparing your text, creating the 3D model, calibrating your 3D printer, troubleshooting your 3D prints and much more. Check out the video below and head over to Allie’s website here to learn more about them.


In this video, Rob shares his top 5 tips for building 3D design and 3D printing skills.


Before moving on to the next toolkit, you should have achieved the below objectives.

  1. I have selected a 3D design software (Tinkercad or Fusion 360) to use for the Make:able Challenge.
  2. I can design an accurate and 3D printable assistive device in 3D design software.


Go to Next Toolkit – Develop Empathy