Printlab Autodesk

4 – Develop Empathy

In this Make:able toolkit, we’ll be guiding you in developing empathy for your end user. This involves:

  1. Learning not only about their disability, but their personality, lifestyle and daily challenges.
  2. Analysing your insights to frame a specific challenge to solve.

In terms of framing a specific challenge to solve, you might find that when you first meet your end user, they already have something in mind that they’d like designing for them. This is a great starting point but don’t forget to go through the full empathy process and learn about all aspects of their lives. Firstly, you might discover surprising things that help you to reframe the challenge in a better way or you might discover a completely different and more important challenge to take on (more info on framing challenges later in the toolkit). And secondly, regardless of whether the challenge is reframed or not, you’ll gain a whole range of insights that will help you when it comes to designing.

Watch the overview video below before browsing through the empathy methods and tips. Then use your key learnings to plan and implement your empathy strategy. Remember that some methods may be better suited to you and your end user so think carefully about which to use. Additionally, you don’t have to stick to the methods in this toolkit – feel free to explore others!


Online Research

Online research can be an invaluable tool in the design process as it allows you to gather insights from multiple global sources in a short period of time. Rather than reinventing the wheel, you can 'stand on the shoulder of giants' but where possible, ensure you couple this with your own primary research methods.

A team interviewing a Make:able end user in a wheelchair.

User Interviews

Interviews are a great way to thoroughly understand the needs and wants of your end users. In addition to revealing answers to your planned questions, the direct face-to-face nature of interviews can lead to surprising insights that you might not have considered. The key to a good interview is careful and considerate planning.

Download Interview Template

A student simulating blindness by playing chess with a blindfold on.

Simulations

Simulating the experience of your intended end user allows you to step into their shoes - to thoroughly understand the physical and emotional aspects of a specific activity. Simulation activities are not a replacement for interactions with real end users but they give designers important and empathetic knowledge.

Watch Example Simulation

A collage cutout of an eye.

Observations

Observations are a creative approach to learning about those we are designing for without interfering with their natural behaviours. When performing observations, ensure you plan suitable activities that your end user is comfortable doing.

View Example Observation

A graphic photomontage of a person stood infront of a daily timeline diagram.

Challenge Mapping

Challenge mapping is a method used for identifying pain points in an individual’s daily routine. It is particularly useful when your end user struggles with multiple tasks throughout the day as it can help you to hone in on the most important area. It works best when combined with other methods such as interviews. Check out the video below and to access the challenge mapping template with examples, copy and paste this link into your browser - https://bit.ly/3fml2JU.

Watch Video

A person holding up a large sheet of paper with an empathy map on.

Empathy Map

Empathy maps are a great way to bring together the highlights from interviews, observations and other practical methods - ensuring teams have a common understanding of their end user. Simply create a quad chart (with the labels: says, thinks, does, feels) and map out key insights in the relevant quadrants. The activity encourages you to think about your end user from multiple angles and provides you with an organised dataset that can be analysed for trends and opportunities.

Download Template

Additional Methods

Looking for more methods? Check out the free trial to PrintLab and head to the Design Method Toolkit – a complete library of problem-solving and design activities that can be used at each stage of the design process. Methods are separated into 4 categories – research, design, evaluation and storytelling. Each method comes with step-by-step instructions, an example and worksheet templates where relevant.

*If you are a student under 18, please request that your teacher signs up to the trial on your behalf. They will then be able to share the Design Method Toolkit with you.

Combine Methods

A good strategy is to combine a practical empathy method with a mapping method. For example, you might perform a user interview and use your insights to create a challenge map. Alternatively, if designing for a Make:able Champion, you might perform a careful observation of their case study video and make educated assumptions to create an empathy map.

Chad Leaman from Makers Making Change.

Working with People with Disabilities

Check out this conversation with Chad Leaman and Justin Pezzin from Makers Making Change, where they talk about best practices for working with people with disabilities.

Watch Video

Andy Lin sat next to a 3D printer.

Get to Know your End Users

Andy Lin, Founder and Director of The Emerging Tech Lab at Rancho Los Amigos National Rehabilitation Center, talks to us about getting to know your end users and not just their disability.

Watch Video

A graphic photomontage of a person taking a photo of another person using a cane.

Capture Footage Respectfully

Documenting your empathy studies is very important but your priority is to ensure your end user is comfortable with your methods. For example, if they are uncomfortable speaking on camera, you might suggest an audio recording or use photography and notes.

A graphic icon of 2 people, representing empathy.

Empathy is Not Sympathy

Remember that both you and your end user share the common goal of achieving a life-improving solution. As long as you are respectful and make them feel comfortable, don't be afraid to ask difficult questions. It's important to focus your efforts on learning about them rather than only sympathising with them.

A student interviewing her Make:able end user.

Zoom in and Out

When developing empathy, we want to get both a broad overview of their lifestyle but also in-depth insights into individual activities. For example, if you're interviewing your end user and come across an interesting point about a specific task they struggle with, dig deep into that to fully understand it and don't be afraid to veer off from your initial interview plan/questions.


This section of the toolkit is for those who have opted to design for a Make:able Champion. 


When designing for a Make:able Champion, you may be limited in that you cannot directly meet with them. However, there are still effective ways you can develop empathy for them. These include:

  1. Researching their disabilities.
  2. Performing careful observations of their case study videos and reading through their profiles.
  3. Thinking creatively to simulate their disabilities, whilst performing various tasks.
  4. Speaking with people who have similar disabilities.

And at the end of the challenge, if Valerie or Cath have an interest in your solution, we will collaborate with you to refine it for their exact needs.


The following 2 sections of this toolkit consist of profiles for our Make:able Champions, Valerie and Cath. Proceed to your Champion’s profile to learn more about them!

Welcome to Caths’s profile!

We are delighted to introduce you to Cath, who is extremely excited to be part of this year’s Make:able challenge. Cath is 76 years young and lives on a narrow boat next to PrintLab’s Lead Designer, Rob! She has osteoarthritis in her knees and hands but is determined to keep as active and creative as possible. Watch the video below to learn more about Cath and her challenges. As you’ll see, there is a main video, followed by snippets of raw footage that provide further details on various things.


Make:able Champion, Cath, showing her hands.

Grasping

In this snippet, Cath discusses her hand mobility in more detail, including details about pain, reflexes, safety and more.

Watch Video

Make:able Champion, cath, sat at her breakfast bar.

Desirable Solutions

In this conversation, Cath and Rob discuss the importance of solutions that are desirable to their users, regardless of their disability.

Watch Video

Make:able Champion, Cath, sat on a chair with her dog on her lap.

Challenge Idea 4

Cath's main profile video highlights 3 challenge ideas to take on. Check out this additional clip, which introduces another potential challenge based on exercise/fidget devices.

Watch Video

Make:able Champion, Cath, kneeling on her kitchen floor.

Standing

In this clip, you'll see the full conversation and observation study where Cath talks us through her difficulty of standing up after bending down.

Watch Video

Make:able Champion Cath exiting her narrow boat.

Boat Access

In these clips, you can observe Cath entering and exiting the boat, whilst talking through her actions and feelings.

Watch Video

Make:able Champion, Cath, pulling out wooden boards to extend her bed.

Bed Access

In these clips, you'll see how Cath's bed is assembled and hear about the difficulties of getting in and out.

Watch Video


Welcome to Valerie’s profile!

Meet Valerie, who was a Champion for last year’s challenge but we are looking for additional solutions to review. Valerie is 66 years young, loves planting flowers and describes herself as a geek and problem sovler! She has had rheumatoid arthritis since she was 3 years old and scoliosis for the last 20 years. She started using a wheelchair 3 years ago and since then her health and quality of life has declined. Watch the video below to learn more about Valerie and the challenge.


Kitchen Counter Measurements

Valerie’s kitchen counter has a height of 36 inches and a depth of 24 inches.

Distance to Floor

If designing a reaching/grabbing device, this should be long enough to reach the floor from Valerie’s wheelchair sitting position. This is approximately 24-30 inches.

House Access

Valerie lives in a bungalow with an attached garage. In the garage there is a power wheelchair lift to take her from the kitchen door to the garage floor at which time she can exit into the backyard or to the driveway and street. Her most frequent problem is closing the kitchen door behind her and when returning opening that same door.

Example Solution

After reviewing some of last year’s Make:able submissions, Valerie saw potential in the below solution called Grip and Grab, which was designed for her by Shawn, Gavin and Ryan from Stratford Academy. She enjoyed the functionality of the solution and welcomes improvements on the length of the device.

View Grip and Grab Video

With your empathy studies complete, it’s now time to frame the challenge. In simple terms, this means honing in on a specific challenge or set of challenges that you will aim to solve. This might involve analysing challenge/empathy maps, replaying recorded footage to pull out key insights or a range of other methods. Remember the goal is to figure out what challenge to solve, not what solution to make! A good way to do this is to explore multiple How Might We statements before selecting the most suitable one. Take a look at the below examples.

Make:able Champion, Bev, using her knuckles to press a button on her TV remote.

Bev

For Bev (last year’s Make:able Champion), who has highly limited mobility in her hands, we might frame the challenge as - ‘How might we help Bev to independently control her TV?’. A key thing to note here is that we are not suggesting a solution. A poor example of a How Might We question would be, ‘How might we help Bev to press buttons on her remote’. Although the solution may involve the remote, by framing it in this way, we are completely limiting ourselves to only thinking about one design avenue.

Make:able Champion, Cath, kneeling on her kitchen floor.

Cath

For Cath (this year’s Make:able Champion), who has osteoarthritis, we might frame the challenge as – ‘How might we help Cath to comfortably stand up from various positions in her boat?’. Again, we are not suggesting a solution at this stage. A poor example would be, ‘How might we create handles to help Cath stand up comfortably in her boat?’.


Spend a few minutes analysing your empathy studies and experimenting with How Might We questions before selecting one to take forward.


When planning and implementing your empathy studies, you don’t need to worry about the fine details of your submission video. However, it’s very important to capture good quality footage of your journey. We recommend documenting absolutely everything, so at the end of your journey, you have an abundance of media to assemble into a final video. You won’t necessarily use all this footage in your final video but it’s much better to have an excess rather than a shortage.

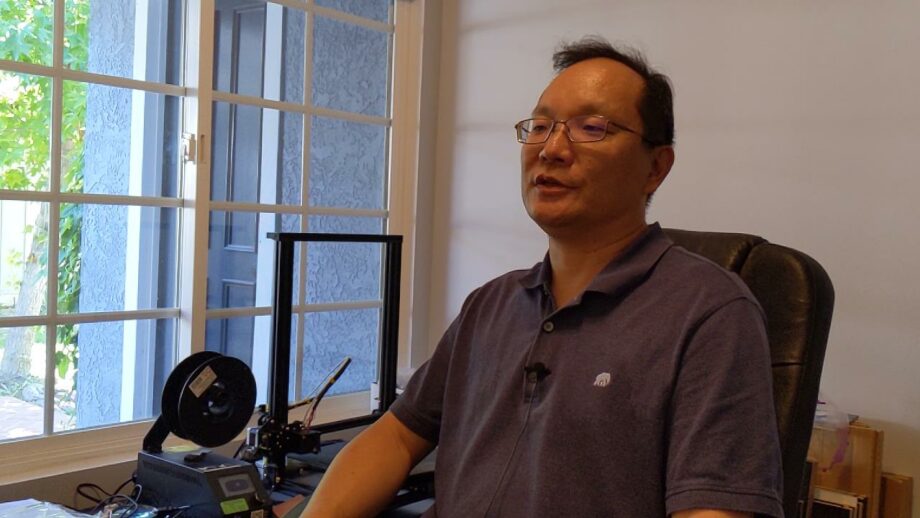
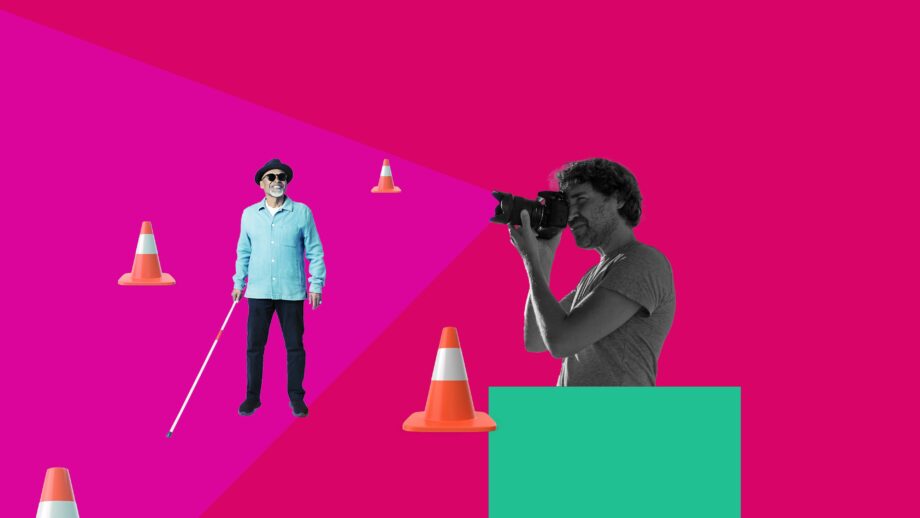
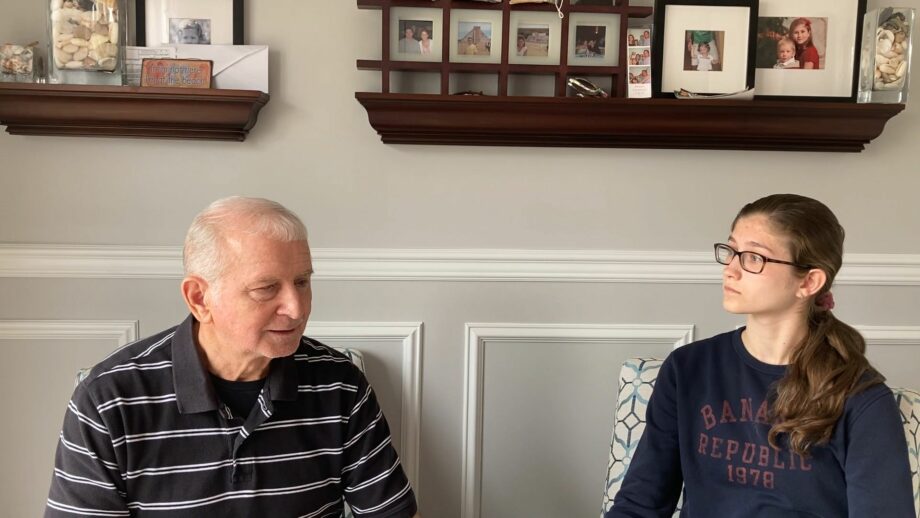
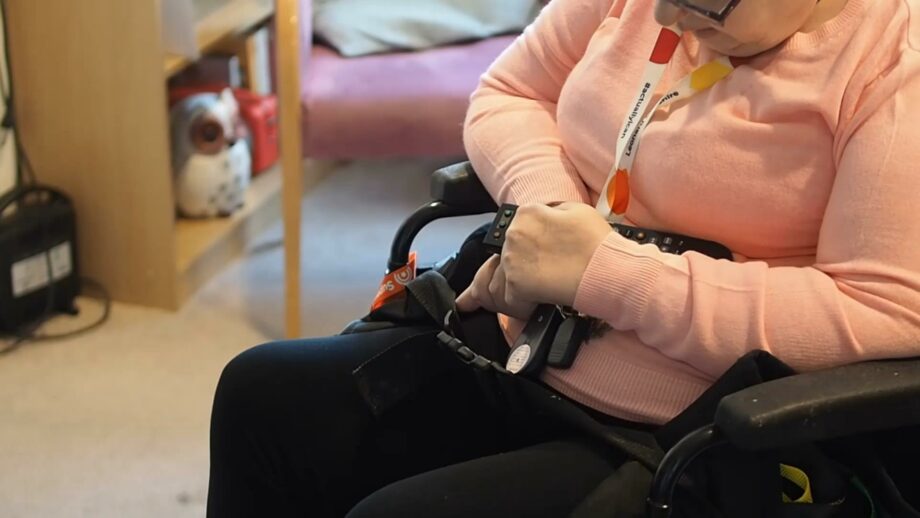
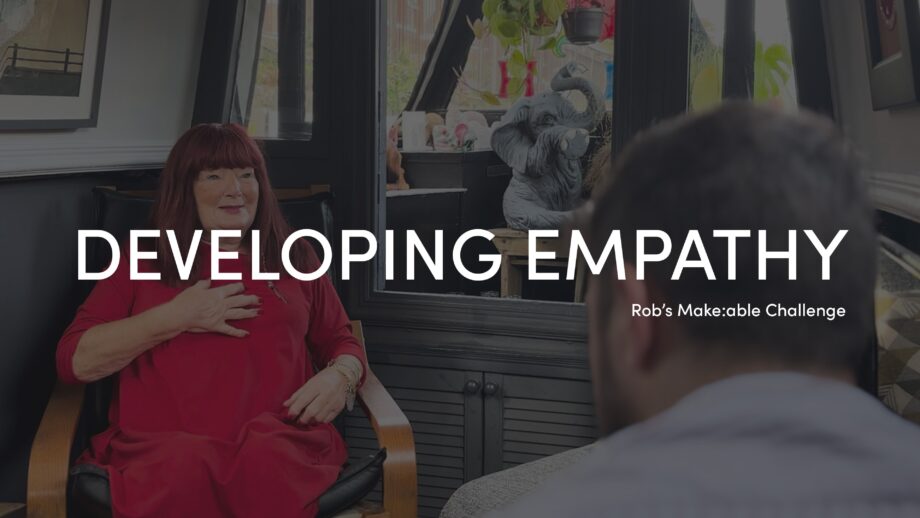
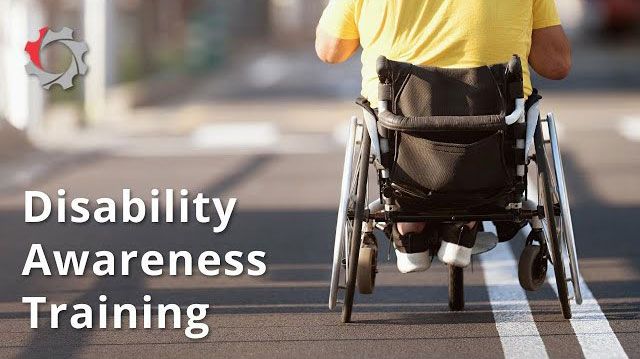
In this section, we highlight several examples of how other teams have documented their empathy studies. The aim is to give you inspiration and ideas for documenting your own journey.

End User Interviews

When interviewing end users, we recommend setting up your camera in a still position using a tripod or another means of stabilisation. This allows you to focus on the interview itself. Don’t worry about any mistakes too as these can be edited out afterwards.

Task Observations

You may consider asking your end user to perform various tasks that you can record. In this example, the team used multiple camera angles, which gives the viewer more perspective.

Context Observations

Another observation technique is to ask your end user to go about their daily routine and capture footage of them in context. This is a great way to make parts of your video look natural without too much ‘staging’.

Hobbies + Interests

In addition to documenting information about their disability, bring the video to life by including footage of your end user’s hobbies, interests and personality. These insights can also inspire the actual look and feel of your design further down the line.

Team B-roll

B-Roll is supplementary footage that is used in between your primary scenes to add context, texture and interesting layers to your final video. Short background clips of your activities are a great b-roll technique to show your team in action.

End User B-roll

Random clips from your end user’s life are another b-roll technique that can be used in the introductory scenes of your video.

Top-down Shots

Top-down shots such as this example arthritis simulation can break up your regular scenes. They work great with a good quality voice over.

Screen Records

Don’t forget to document the insights you gained from your empathy studies. This example shows a screen recording of key learnings.


In addition to the above tips and examples, we encourage you to think carefully about lighting and audio, which make a huge difference to video quality. This doesn’t necessarily mean you need expensive equipment. Make the most of natural lighting and simply be aware of noisy environments. We hope you found these tips helpful! Remember that you don’t need to use all the tips – they are simply here to make you aware of different techniques available to you.


In this video, Rob shares his process of developing empathy for Cath, which involved an interview, observation studies and much more.


Before moving on to the next toolkit, you should have achieved the below objectives.

  1. I can define the term empathy in the context of designing an assistive device for an individual.
  2. I can plan and implement a human-centred design strategy to develop empathy for an end user.
  3. I can analyse and use data/information from empathy studies to frame design opportunities.


Go to Next Toolkit – Idea Generation